
Blog
Exploring the Honda CMX: A Comprehensive Guide to Models and Engine Configurations
Jun
As a seasoned mechanic, I’ve had the opportunity to work on various motorcycles, each with its unique characteristics and engineering marvels. Today, we delve into the world of the Honda CMX, a remarkable series of motorcycles that have captured the hearts of riders with their impressive performance and stunning design. In this article, we’ll explore the different models and engine configurations available in the Honda CMX lineup, providing you with an in-depth understanding of these exceptional machines.
Model Overview:
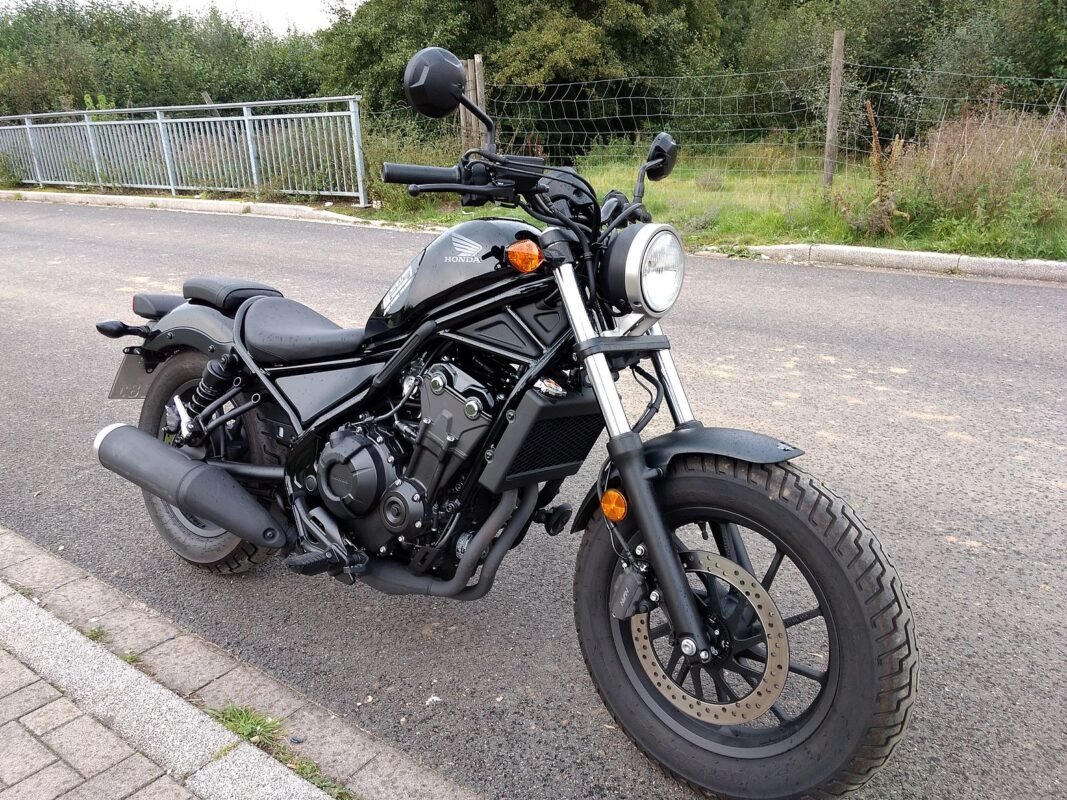
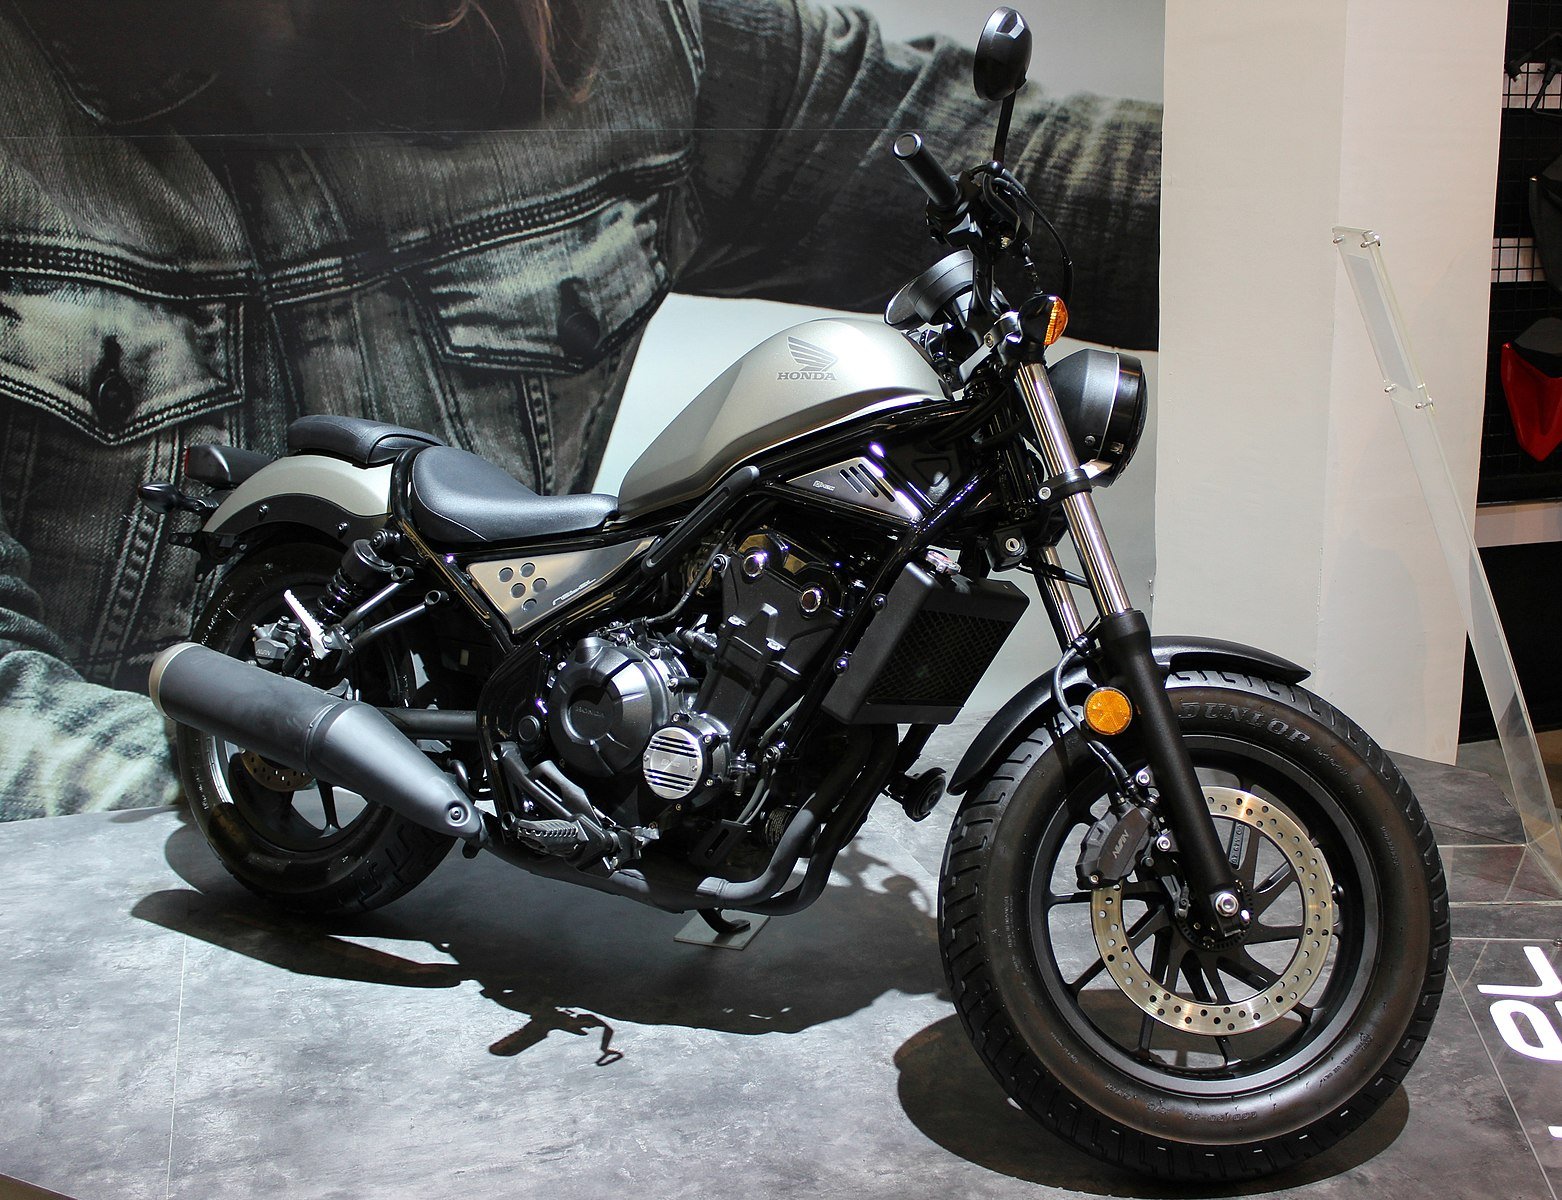
The Honda CMX, also known as the Honda Rebel, is a line of motorcycles that combines classic styling with modern features. With a low-slung cruiser design and a comfortable riding position, the CMX series is ideal for both new and experienced riders seeking an exhilarating two-wheeled adventure. Let’s now delve into the various models and their distinct engine configurations.
Honda CMX300 Rebel:
The CMX300 Rebel is the entry-level model in the CMX series. It features a compact and fuel-efficient 286cc single-cylinder engine. This engine is equipped with Honda’s advanced fuel injection system, ensuring smooth power delivery and excellent throttle response. The lightweight nature of the CMX300 makes it agile and nimble, perfect for maneuvering through city streets and tight corners.
Honda CMX500 Rebel:
Stepping up in the lineup, we have the Honda CMX500 Rebel. This mid-range model boasts a robust 471cc parallel-twin engine. With its increased displacement, the CMX500 offers enhanced power and torque, delivering an exhilarating riding experience. The parallel-twin configuration ensures smooth operation and balanced performance, making it an excellent choice for both urban commuting and longer journeys.

Engine Technology:
Honda has always been at the forefront of technological innovation, and the CMX series reflects this commitment. The engines in the Honda CMX lineup incorporate several advanced features that enhance performance, fuel efficiency, and reliability. Some notable technologies include:
Programmed Fuel Injection (PGM-FI):
All Honda CMX models come equipped with PGM-FI, a cutting-edge fuel injection system that optimizes the air-fuel mixture for efficient combustion. This technology ensures smooth power delivery, improved fuel efficiency, and reduced emissions, aligning with Honda’s commitment to environmental sustainability.
Liquid Cooling System:
To maintain optimal operating temperatures, the CMX series utilizes a liquid cooling system. By efficiently dissipating heat, this system prevents overheating and provides consistent performance, even in demanding riding conditions. This feature is particularly beneficial during long rides or when navigating through heavy traffic.
Assist/Slipper Clutch:
The CMX500 Rebel comes equipped with an assist/slipper clutch, enhancing rider comfort and control. This technology reduces clutch lever effort, making gear shifts smooth and effortless. Additionally, the slipper function minimizes rear-wheel hop during aggressive downshifting, increasing stability and improving overall safety.
The Honda CMX series, with its range of models and engine configurations, offers something for every rider. Whether you’re a beginner seeking a manageable and stylish ride or an experienced enthusiast craving more power and performance, the CMX lineup has you covered. With their blend of classic aesthetics and modern technology, Honda CMX motorcycles provide an exceptional riding experience. So, whether you’re cruising through the city streets or embarking on an adventure, the Honda CMX is a motorcycle that combines style, reliability, and excitement in one impressive package.
A Comprehensive Guide to Regular Maintenance for the Honda CMX
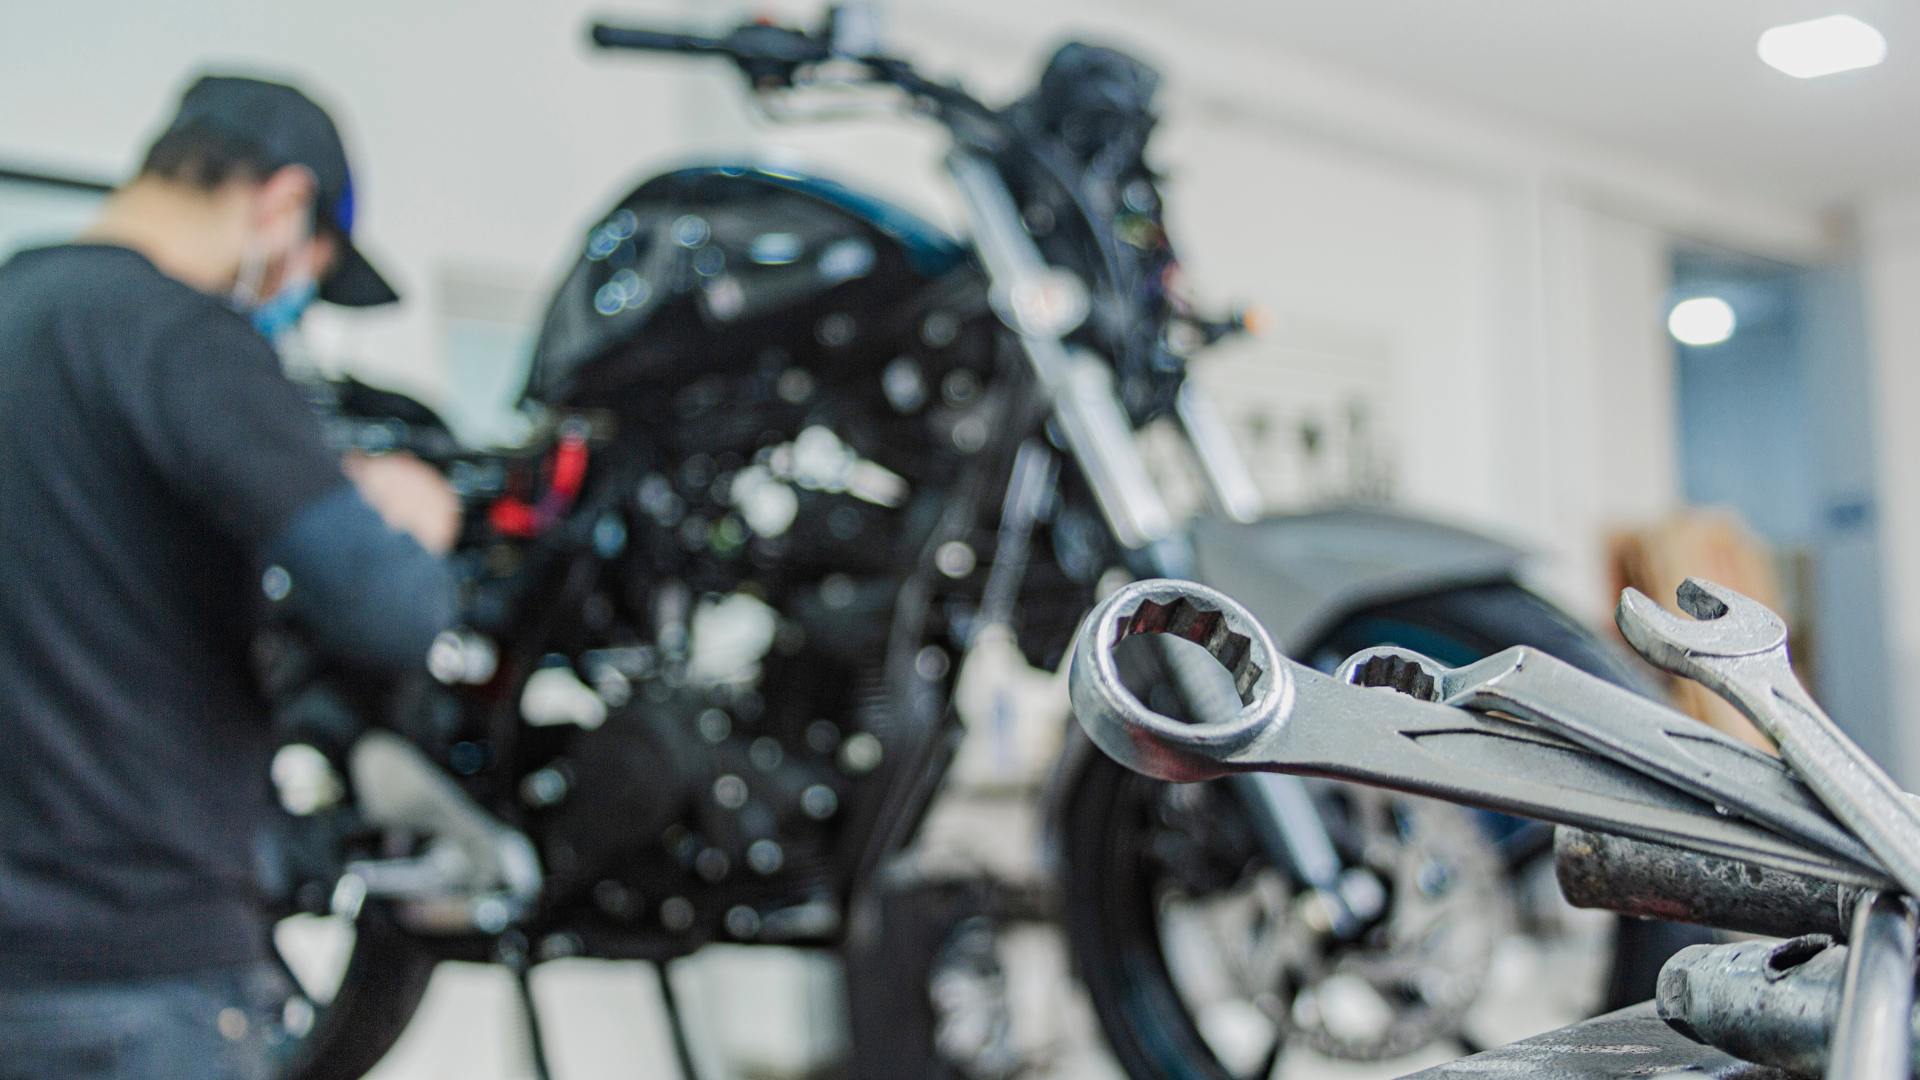
As a seasoned mechanic with a passion for motorcycles, I understand the importance of regular maintenance in ensuring the longevity and optimal performance of your beloved Honda CMX. In this article, I will provide you with a detailed guide on performing routine maintenance tasks for your Honda CMX, helping you keep your motorcycle in top-notch condition for countless miles of exhilarating rides. So grab your tools and let’s dive into the world of maintenance for the Honda CMX.
Oil Change:
Regular oil changes are crucial to maintain the health of your engine. Begin by warming up the engine to ensure the oil flows easily. Next, locate the drain plug beneath the engine and place a drain pan beneath it. Remove the drain plug, allowing the old oil to drain completely. Replace the drain plug and proceed to remove the oil filter using an oil filter wrench. Before installing a new filter, lubricate its rubber gasket with fresh oil. Finally, refill the engine with the recommended oil, ensuring it reaches the appropriate level as indicated on the dipstick.
Air Filter Cleaning/Replacement:
The air filter prevents dirt and debris from entering the engine, ensuring optimal performance. Start by locating the air filter housing, usually situated beneath the fuel tank or seat. Remove the housing cover and inspect the air filter. If it’s clogged or damaged, replace it with a new one. If it’s reusable, clean it using compressed air or by gently tapping it to remove debris. Once cleaned or replaced, reinstall the air filter and secure the housing cover.
Spark Plug Inspection/Replacement:
Spark plugs play a crucial role in igniting the air-fuel mixture in the combustion chamber. Over time, they can become fouled or worn, affecting engine performance. Begin by removing the spark plug cap and using a spark plug socket, carefully remove the spark plug. Inspect its condition and electrode gap. If the plug is fouled or the gap is incorrect, replace it with a new one of the recommended specification. Ensure the spark plug is tightened to the specified torque and reconnect the spark plug cap.
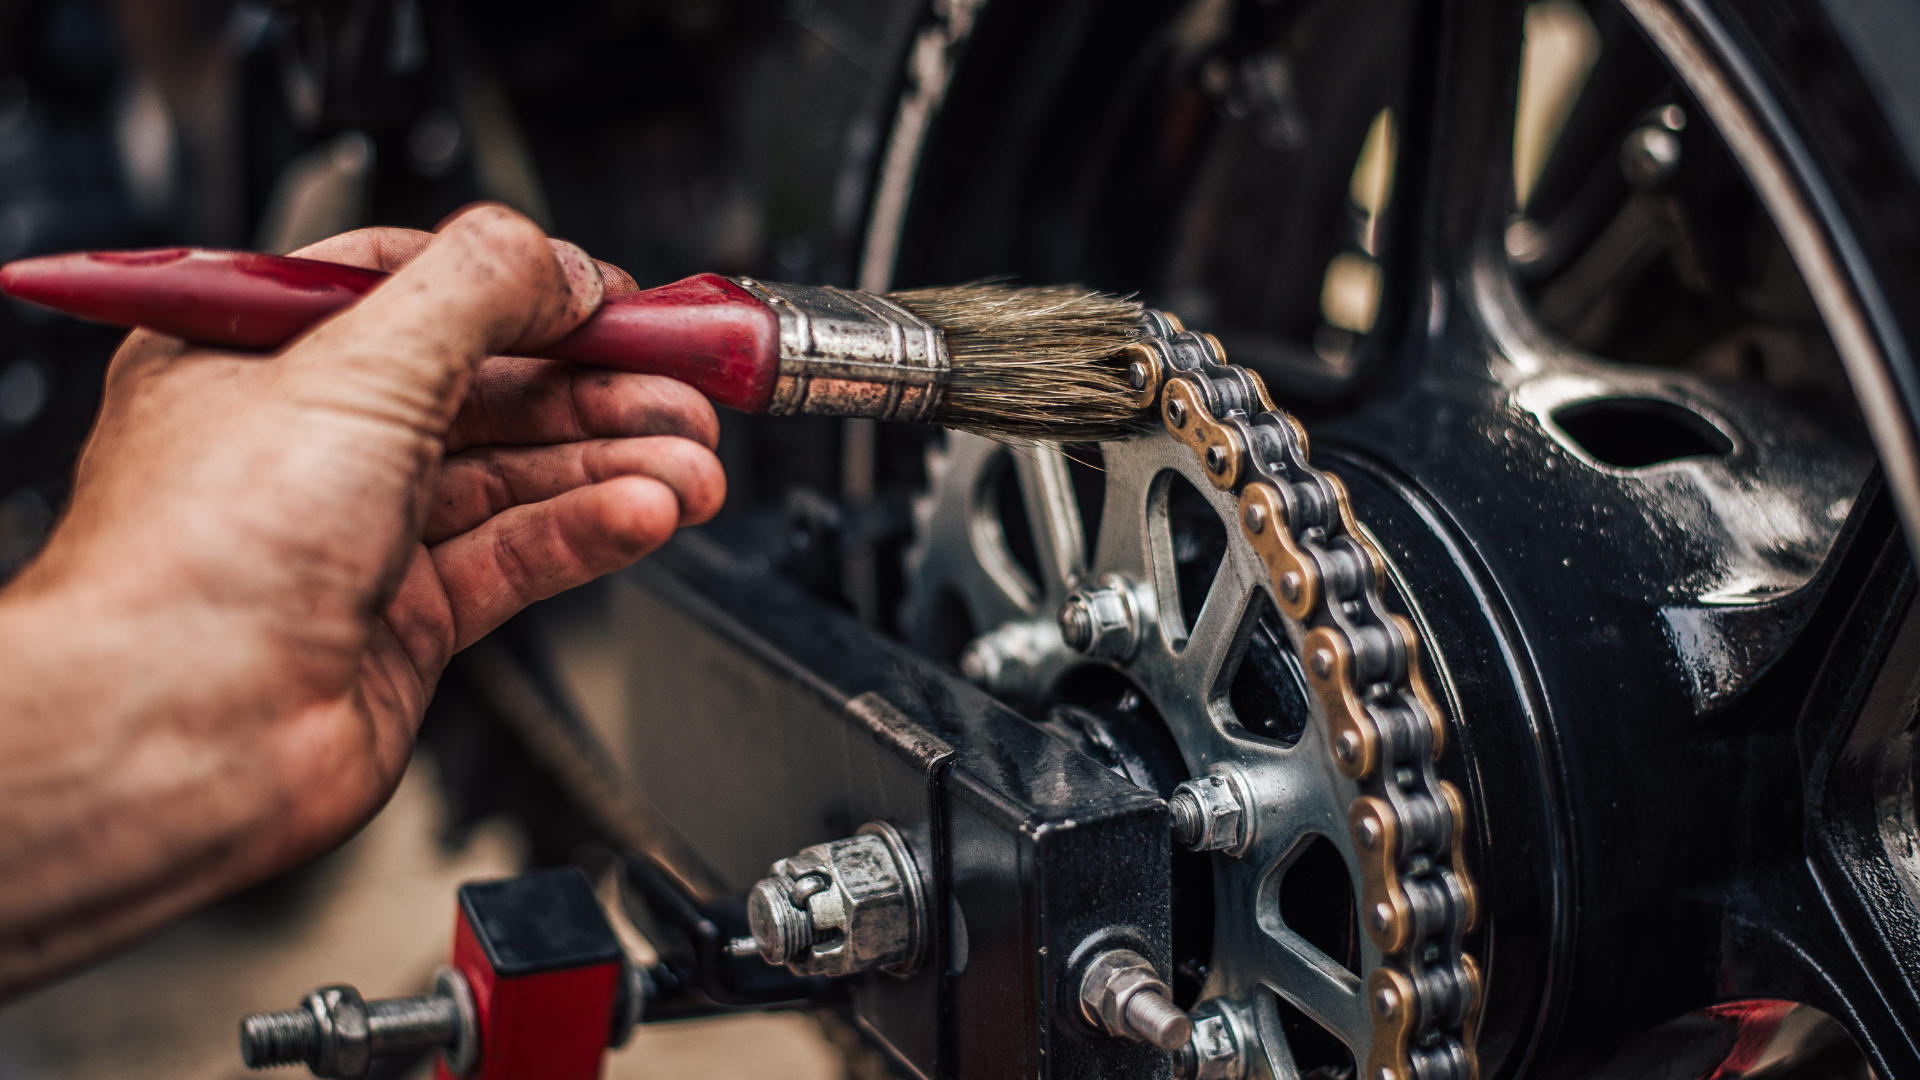
Chain Lubrication and Adjustment:
Proper chain maintenance is essential for smooth power transmission and prolonged chain life. Start by securing the motorcycle on a center stand or using a rear stand. Clean the chain using a suitable chain cleaner and a brush, removing dirt and grime. Once dry, apply a high-quality chain lubricant evenly along the entire length of the chain. After lubrication, check the chain tension. There should be a small amount of slack when pulling the chain away from the rear sprocket. Adjust the tension if necessary, referring to the owner’s manual for the recommended specifications.
Brake Inspection and Pad Replacement:
Safe and responsive brakes are vital for rider confidence and safety. Regularly inspect the brake pads for wear. If the pads are worn close to the minimum thickness, replace them immediately. Begin by removing the brake caliper bolts and gently lifting the caliper away from the brake rotor. Remove the worn brake pads and insert the new ones. Slide the caliper back into position and tighten the caliper bolts securely. Test the brakes before riding to ensure proper operation.
Maintaining your Honda CMX through regular maintenance tasks is the key to a reliable and enjoyable riding experience. By following these steps for oil changes, air filter cleaning/replacement, spark plug inspection/replacement, chain lubrication and adjustment, and brake inspection/pad replacement, you’ll keep your Honda CMX in optimal condition. Remember to consult your owner’s manual for specific guidelines and recommended service intervals. So, invest the time and effort into maintaining your Honda CMX, and it will reward you with many miles of exhilarating rides on the open road.
Troubleshooting Common Issues in the Honda CMX: A Mechanic’s Guide
As a knowledgeable mechanic, I’ve encountered various motorcycle issues throughout my career, and the Honda CMX is no exception. While the Honda CMX series is renowned for its reliability, like any machine, it can experience certain common problems. In this article, I’ll guide you through some of the most prevalent issues that Honda CMX owners may encounter. By understanding these problems and their potential solutions, you’ll be better equipped to keep your Honda CMX running smoothly for countless miles of riding pleasure.
Electrical System Issues:
Electrical problems can manifest in various ways, such as a malfunctioning starter, flickering lights, or a dead battery. Begin troubleshooting by checking the battery’s condition and connections. Ensure the battery is adequately charged and free from corrosion. Examine the fuses for any signs of damage and replace as necessary. If the issue persists, inspect the wiring harness for loose connections or damaged wires. In some cases, professional assistance may be required to diagnose and resolve complex electrical issues.
Fuel System Troubles:
Fuel-related problems can affect engine performance and result in rough idling, hesitation, or poor fuel efficiency. Start by checking the fuel tank for any contaminants or debris. If present, clean the tank and replace the fuel filter. Inspect the fuel lines for leaks or blockages, ensuring they are properly connected. If the issue persists, consider cleaning the carburetor or fuel injection system to remove any accumulated deposits. Alternatively, it may be necessary to adjust the fuel mixture or seek professional help for precise diagnosis and repair.
Braking System Concerns:
Brake-related issues can compromise safety and require immediate attention. Common problems include a spongy brake lever, excessive brake noise, or reduced braking effectiveness. Begin by inspecting the brake fluid level and condition. If it appears low or contaminated, flush and replace the brake fluid following the manufacturer’s recommendations. Check the brake pads for wear and replace them if necessary. If the issue persists, examine the brake calipers and rotors for any signs of damage or misalignment. Professional assistance should be sought if the problem remains unresolved.
Suspension and Handling Challenges:
Suspension problems can lead to a harsh ride, instability, or poor handling characteristics. Start by inspecting the front forks and rear shocks for leaks, damage, or excessive wear. If any issues are found, consider replacing or rebuilding the affected components. Ensure the suspension settings are properly adjusted according to your riding preferences and weight. Additionally, check the tire pressure and condition, as improper tire maintenance can significantly impact ride quality and handling. Regularly rotate and replace tires as needed to maintain optimal performance.
Transmission and Gear Shifting Issues:
Problems with gear shifting can result in difficulty engaging or changing gears smoothly. Begin by inspecting the clutch lever and cable for proper adjustment and lubrication. Check the clutch plates for wear and replace if necessary. If the issue persists, the transmission may require further inspection and possible repairs. Seek professional assistance from a qualified mechanic to diagnose and resolve complex transmission problems.
While the Honda CMX series is known for its reliability, it’s essential to be aware of the common issues that can arise during ownership. By familiarizing yourself with potential problems such as electrical system issues, fuel system troubles, braking system concerns, suspension and handling challenges, and transmission and gear shifting issues, you’ll be better equipped to diagnose and address them promptly. Remember to consult your owner’s manual for specific guidelines and seek professional assistance when needed. By staying proactive and addressing these issues promptly, you can ensure that your Honda CMX delivers a smooth and enjoyable riding experience for years to come.
Unveiling the Honda CMX: Answers to the Most Searched Questions on the Web
As a knowledgeable mechanic with a deep understanding of the Honda CMX, I am well aware of the questions and inquiries that prospective and current owners have about this exceptional motorcycle. In this article, I will address the most frequently searched questions on the web regarding the Honda CMX. By providing comprehensive answers and insights, I aim to equip you with the knowledge necessary to make informed decisions and maximize your enjoyment of this remarkable vehicle.
What does “CMX” stand for in Honda CMX?
The “CMX” in Honda CMX stands for “Cruiser Motorcycle eXtreme.” It represents Honda’s commitment to delivering an extraordinary cruising experience through a blend of classic design, modern technology, and exceptional performance.
What is the engine displacement of the Honda CMX?
The Honda CMX series offers two engine options: the CMX300 Rebel with a 286cc engine and the CMX500 Rebel with a 471cc engine. These engines provide a perfect balance of power, efficiency, and maneuverability for both new and experienced riders.
Is the Honda CMX suitable for beginners?
Yes, the Honda CMX is a popular choice for beginners due to its manageable size, comfortable riding position, and user-friendly features. The CMX series provides an accessible entry point into the cruiser motorcycle segment, offering a smooth and stable ride that instills confidence in novice riders.
What is the fuel efficiency of the Honda CMX?
The fuel efficiency of the Honda CMX varies depending on several factors, including riding conditions, maintenance, and individual riding style. On average, the CMX300 Rebel achieves around 70-80 miles per gallon (mpg), while the CMX500 Rebel achieves approximately 60-70 mpg. These figures highlight the CMX series’ impressive fuel economy, making it an economical choice for daily commuting and long-distance rides.
Does the Honda CMX come with ABS (Anti-lock Braking System)?
Yes, both the Honda CMX300 Rebel and CMX500 Rebel models are available with optional ABS. ABS is a valuable safety feature that prevents wheel lock-up during hard braking, enhancing stability and control, especially in emergency situations. Opting for ABS can provide an additional layer of safety and peace of mind while riding the Honda CMX.
Can the Honda CMX be customized?
Yes, the Honda CMX is highly customizable, allowing riders to personalize their motorcycles according to their preferences and individual style. There is a vast array of aftermarket accessories and modifications available, including but not limited to, handlebars, exhaust systems, seats, luggage options, and cosmetic enhancements. Customizing your Honda CMX allows you to create a unique and personalized riding experience.
The Honda CMX has captured the imagination of riders worldwide with its striking design, impressive performance, and versatility. By addressing the most searched questions on the web regarding the Honda CMX, we have shed light on crucial aspects of this extraordinary motorcycle. Whether you’re a beginner seeking a reliable and stylish ride or an experienced rider looking for a cruiser that delivers an exhilarating experience, the Honda CMX series has something to offer. So, armed with this newfound knowledge, take to the open road and enjoy the thrilling adventure that awaits you on your Honda CMX.
Unveiling the Honda CMX: Fascinating Insights and Trivia About This Model
As an experienced mechanic with a keen interest in motorcycles, I am excited to share some intriguing and lesser-known facts about the Honda CMX. This exceptional model has captured the hearts of riders worldwide with its unique design, impressive performance, and exceptional features. In this article, we will delve into the fascinating world of the Honda CMX, uncovering interesting insights and trivia about this remarkable motorcycle.
Evolution from the Honda Rebel:
The Honda CMX is also known as the Honda Rebel in certain markets. Originally introduced in 1985 as the CMX250 Rebel, this model gained popularity among beginner riders and enthusiasts alike. Over the years, Honda expanded the Rebel series to include the CMX300 Rebel and the CMX500 Rebel, providing a wider range of engine options and customization opportunities.
Inspired by American Cruiser Motorcycles:
The Honda CMX draws inspiration from classic American cruiser motorcycles, featuring a low-slung design, relaxed riding position, and nostalgic styling cues. This blend of timeless aesthetics and modern engineering has helped the CMX series carve its own identity in the world of cruisers.
Lightweight and Nimble:
One of the standout features of the Honda CMX is its lightweight construction, which contributes to its nimble handling and maneuverability. The CMX300 Rebel weighs approximately 364 pounds (165 kilograms), while the CMX500 Rebel weighs around 408 pounds (185 kilograms). This lightweight nature makes the CMX series accessible and easy to handle for riders of all skill levels.
Customization Opportunities:
The Honda CMX is a canvas for personalization and customization. With a wide range of aftermarket accessories and modifications available, riders can tailor their CMX motorcycles to reflect their individual style and preferences. From handlebars and exhaust systems to seats and cosmetic enhancements, the possibilities for customization are virtually endless.
A Strong Foundation:
The Honda CMX boasts a sturdy frame and a reliable engine, making it a durable and dependable choice for riders. Its robust construction ensures stability and longevity, allowing riders to enjoy countless miles of riding pleasure with minimal maintenance.
Designed for Urban Riding:
While the Honda CMX is suitable for various riding conditions, its design and features make it particularly well-suited for urban environments. The low seat height, agile handling, and efficient engine make the CMX series ideal for navigating through congested city streets, tight corners, and urban commutes.
Fuel Efficiency:
The Honda CMX series is renowned for its impressive fuel efficiency. With their lightweight construction and efficient engines, the CMX300 Rebel and CMX500 Rebel offer excellent mileage, allowing riders to travel long distances on a single tank of fuel. This fuel efficiency not only saves money but also reduces the environmental impact of riding.
The Honda CMX is more than just a motorcycle; it’s a symbol of freedom, individuality, and timeless design. From its evolution as the Honda Rebel to its lightweight construction, customization opportunities, and urban-friendly features, the CMX series has captured the imagination of riders worldwide. By exploring the fascinating insights and trivia about the Honda CMX, we have gained a deeper appreciation for this exceptional model. So, whether you’re a beginner rider seeking a stylish and accessible cruiser or an experienced enthusiast looking to customize your ride, the Honda CMX offers an extraordinary blend of performance, style, and versatility. Embrace the spirit of adventure and hit the open road on your Honda CMX, knowing that you’re riding a motorcycle that embodies the essence of two-wheeled freedom.
Unleash the Power: The Advantages of Purchasing the Aftermarket Sport Exhaust for the Honda CMX 1100

As a seasoned mechanic, I am always on the lookout for aftermarket upgrades that enhance both the performance and aesthetics of motorcycles. Today, I am excited to delve into the advantages of acquiring the aftermarket sport exhaust for the Honda CMX 1100. This high-quality exhaust system, available at Racext, offers a range of benefits that can elevate your riding experience to new heights. In this article, we will explore the reasons why you should consider investing in this product and how it can transform your Honda CMX 1100.
Enhanced Performance:
Upgrading to the aftermarket sport exhaust for the Honda CMX 1100 can significantly improve the motorcycle’s performance. This exhaust system is designed to optimize exhaust gas flow, reducing back pressure and enhancing engine efficiency. The result is a noticeable increase in horsepower and torque, delivering a thrilling and exhilarating ride that will leave you craving more.
Aggressive Sound:
One of the most enticing aspects of the aftermarket sport exhaust is the captivating sound it produces. The Honda CMX 1100 with this exhaust system emits a deep and resonant tone that commands attention on the road. The exhilarating sound not only adds to the overall riding experience but also gives your motorcycle a distinct and sporty character that sets it apart from the crowd.
Superior Materials and Craftsmanship:
The aftermarket sport exhaust for the Honda CMX 1100 is crafted using high-quality materials, ensuring durability and longevity. Stainless steel or carbon fiber construction provides excellent resistance to corrosion, while precision welding techniques guarantee a robust and seamless exhaust system. This product is designed to withstand the rigors of daily riding and offer long-lasting performance.
Weight Reduction:
The aftermarket sport exhaust is considerably lighter than the stock exhaust system, resulting in a reduction in overall weight for the Honda CMX 1100. This weight reduction improves the motorcycle’s handling and maneuverability, allowing for more agile cornering and increased responsiveness. You will experience a newfound sense of control and confidence when navigating through twists and turns.
Eye-Catching Aesthetics:
In addition to its performance benefits, the aftermarket sport exhaust enhances the visual appeal of your Honda CMX 1100. With its sleek design and attention to detail, this exhaust system adds a touch of sportiness and aggression to the motorcycle’s overall look. It serves as a statement piece, turning heads wherever you ride and showcasing your individual style.
Easy Installation:
Installing the aftermarket sport exhaust for the Honda CMX 1100 is a straightforward process. The exhaust system is designed to fit seamlessly onto the motorcycle, utilizing the existing mounting points and hardware. This means you can enjoy the benefits of the upgraded exhaust without the need for extensive modifications or complex installations.
Investing in the aftermarket sport exhaust for the Honda CMX 1100 is a decision that brings a multitude of advantages. From the performance enhancements and exhilarating sound to the superior craftsmanship and eye-catching aesthetics, this exhaust system truly elevates your riding experience. The lightweight construction, ease of installation, and durability of the exhaust further solidify its position as a worthwhile investment.
When you choose the aftermarket sport exhaust for your Honda CMX 1100 from Racext, you are not only enhancing the overall performance and appearance of your motorcycle but also immersing yourself in the world of superior craftsmanship and unmatched riding pleasure. So, unleash the power and make a statement on the road with the aftermarket sport exhaust for the Honda CMX 1100. Get ready to experience the thrill and excitement that this remarkable upgrade brings to your two-wheeled adventures.
Step-by-Step Guide: Installing the Aftermarket Sport Exhaust for the Honda CMX 1100

As a skilled mechanic, I understand the importance of proper installation when it comes to aftermarket upgrades. Today, we will delve into the step-by-step process of installing the aftermarket sport exhaust for the Honda CMX 1100. This high-quality exhaust system, available at Racext, offers an enhanced riding experience and a distinctive sound. By following this comprehensive guide, you can ensure a seamless and successful installation of this remarkable product.
Tools Required:
Before we begin, make sure you have the following tools on hand:
- Socket wrench set
- Allen wrench set
- Torque wrench
- Screwdriver (Phillips and flathead)
- Penetrating oil or rust remover (if necessary)
- Rubber mallet (optional, for stubborn connections)
Step 1: Preparation
Ensure that your Honda CMX 1100 is on a stable and level surface. Make sure the engine is cool to the touch before starting the installation process. Gather all the necessary tools and place them within reach for easy access.
Step 2: Removing the Stock Exhaust System
Locate the mounting bolts that secure the stock exhaust system to the motorcycle’s engine or frame. Depending on the specific model and year of your CMX 1100, there may be multiple mounting points.
Use the appropriate socket wrench or Allen wrench to loosen and remove the mounting bolts. Set them aside in a safe place, as you will need them later.
Carefully slide the stock exhaust system off the mounting points, taking care not to damage any surrounding components. If the exhaust is stuck or corroded, apply penetrating oil or rust remover to facilitate easier removal.
Gently wiggle and twist the stock exhaust system until it comes free from the motorcycle.
Step 3: Preparing the Aftermarket Sport Exhaust
Inspect the aftermarket sport exhaust and ensure that all components are included and undamaged. Compare the new exhaust to the stock system to familiarize yourself with any differences in design and mounting points.
Attach any included brackets or hangers to the aftermarket exhaust as per the manufacturer’s instructions. These components will help secure the exhaust system to the motorcycle.
Step 4: Installing the Aftermarket Sport Exhaust
Carefully position the aftermarket sport exhaust onto the mounting points previously occupied by the stock exhaust system.
Insert the mounting bolts through the exhaust system’s brackets or hangers and align them with the corresponding mounting points on the motorcycle’s frame or engine.
Hand-tighten the mounting bolts to ensure proper alignment before fully tightening them with a torque wrench. Refer to the manufacturer’s specifications for the recommended torque settings for each bolt.
Double-check the alignment of the exhaust system to ensure that it is straight and symmetrical.
Once all the mounting bolts are properly tightened, give the exhaust system a gentle shake to ensure it is securely attached to the motorcycle.
Step 5: Final Checks
Inspect the installed aftermarket sport exhaust for any signs of interference with other components. Ensure that there is sufficient clearance between the exhaust and the motorcycle’s bodywork, suspension, and other parts.
Start the engine and listen for any unusual noises or rattling sounds. Rev the engine gently and check for any exhaust leaks.
Take a short test ride to verify that the exhaust system is functioning properly and that there are no abnormal vibrations or handling issues.
By following this step-by-step guide, you can confidently install the aftermarket sport exhaust for your Honda CMX 1100. Remember to exercise caution, take your time, and refer to the manufacturer’s instructions throughout the installation process. With the new exhaust system in place, you can look forward to an enhanced riding experience, improved performance, and the distinct sound that sets your Honda CMX 1100 apart from the rest. Enjoy the thrill of the road with your newly installed aftermarket sport exhaust and embrace the exhilaration it brings to your two-wheeled adventures.
Elevate Your Ride: The Benefits of Acquiring the Aftermarket Sport Exhaust for the Honda CMX 500

As an experienced mechanic, I am passionate about finding aftermarket upgrades that enhance both the performance and aesthetics of motorcycles. Today, I am thrilled to delve into the advantages of purchasing the aftermarket sport exhaust for the Honda CMX 500. Available at Racext, this high-quality exhaust system offers a range of benefits that can transform your riding experience. In this article, we will explore why investing in this product is a wise choice and provide a step-by-step guide on how to install it onto your Honda CMX 500.
Part 1: The Advantages of Acquiring the Aftermarket Sport Exhaust for the Honda CMX 500
Enhanced Performance:
One of the primary reasons to consider purchasing the aftermarket sport exhaust for your Honda CMX 500 is the significant performance enhancement it offers. This exhaust system is meticulously designed to optimize exhaust gas flow, reducing back pressure and increasing engine efficiency. The result is a noticeable boost in horsepower and torque, delivering a more exhilarating and dynamic ride that will leave you craving for more.
Striking Sound:
The aftermarket sport exhaust system for the Honda CMX 500 produces a captivating sound that sets your motorcycle apart from the rest. It emits a deep and resonant tone, exuding a sense of power and performance. The unique sound not only adds to the overall riding experience but also gives your motorcycle a distinctive and sporty character that turns heads wherever you ride.
Lightweight Construction:
The aftermarket sport exhaust is considerably lighter than the stock exhaust system, contributing to improved overall performance. The reduced weight enhances the motorcycle’s maneuverability, making it more agile and responsive on the road. You will experience better cornering, increased throttle response, and an overall heightened sense of control.
Eye-Catching Aesthetics:
In addition to its performance benefits, the aftermarket sport exhaust enhances the visual appeal of your Honda CMX 500. With its sleek design and attention to detail, this exhaust system adds a touch of sportiness and aggression to the motorcycle’s overall look. It serves as a stylish upgrade, elevating the aesthetics and individuality of your ride.
Durable and Long-Lasting:
The aftermarket sport exhaust for the Honda CMX 500 is built to withstand the rigors of daily riding. Constructed with high-quality materials, such as stainless steel or carbon fiber, it offers excellent resistance to corrosion and ensures long-lasting performance. This product is designed to endure the demands of the road, providing you with reliability and peace of mind.
Part 2: Step-by-Step Installation Guide
Now let’s walk through the installation process of the aftermarket sport exhaust for the Honda CMX 500:
Tools Required:
Before you begin, gather the following tools:
- Socket wrench set
- Allen wrench set
- Torque wrench
- Screwdriver (Phillips and flathead)
- Penetrating oil or rust remover (if necessary)
- Rubber mallet (optional, for stubborn connections)
Step 1: Preparation
Ensure that your Honda CMX 500 is parked on a stable and level surface. Allow the engine to cool before beginning the installation process. Gather all the necessary tools and place them within reach for easy access.
Step 2: Removing the Stock Exhaust System
Locate the mounting bolts that secure the stock exhaust system to the motorcycle’s engine or frame. Depending on the specific model and year of your CMX 500, there may be multiple mounting points.
Use the appropriate socket wrench or Allen wrench to loosen and remove the mounting bolts. Set them aside in a safe place, as you will need them later.
Carefully slide the stock exhaust system off the mounting points, taking care not to damage any surrounding components. If the exhaust is stuck or corroded, apply penetrating oil or rust remover to facilitate easier removal.
Gently wiggle and twist the stock exhaust system until it comes free from the motorcycle.
Step 3: Preparing the Aftermarket Sport Exhaust
Inspect the aftermarket sport exhaust and ensure that all components are included and undamaged. Compare the new exhaust to the stock system to familiarize yourself with any differences in design and mounting points.
Attach any included brackets or hangers to the aftermarket exhaust as per the manufacturer’s instructions. These components will help secure the exhaust system to the motorcycle.
Step 4: Installing the Aftermarket Sport Exhaust
Carefully position the aftermarket sport exhaust onto the mounting points previously occupied by the stock exhaust system.
Insert the mounting bolts through the exhaust system’s brackets or hangers and align them with the corresponding mounting points on the motorcycle’s frame or engine.
Hand-tighten the mounting bolts to ensure proper alignment before fully tightening them with a torque wrench. Refer to the manufacturer’s specifications for the recommended torque settings for each bolt.
Double-check the alignment of the exhaust system to ensure that it is straight and symmetrical.
Once all the mounting bolts are properly tightened, give the exhaust system a gentle shake to ensure it is securely attached to the motorcycle.
Step 5: Final Checks
Inspect the installed aftermarket sport exhaust for any signs of interference with other components. Ensure that there is sufficient clearance between the exhaust and the motorcycle’s bodywork, suspension, and other parts.
Start the engine and listen for any unusual noises or rattling sounds. Rev the engine gently and check for any exhaust leaks.
Take a short test ride to verify that the exhaust system is functioning properly and that there are no abnormal vibrations or handling issues.
Investing in the aftermarket sport exhaust for the Honda CMX 500 from Racext is a decision that brings numerous benefits. From the performance enhancements and captivating sound to the lightweight construction and eye-catching aesthetics, this exhaust system elevates your riding experience to new heights. With its durability and easy installation process, you can enjoy the advantages of this remarkable upgrade with confidence. Enhance your Honda CMX 500 today and embrace the exhilaration that comes with the aftermarket sport exhaust.
Unleash the Power: The Benefits of Acquiring the Chip Tuning Module for the Honda CMX 1100
As a seasoned mechanic, I am always on the lookout for innovative products that can enhance the performance of motorcycles. Today, I am excited to share insights on the chip tuning module for the Honda CMX 1100. Available at Racext, this cutting-edge product offers a range of advantages that can revolutionize your riding experience. In this article, we will explore the reasons why investing in this module is a smart choice, and I will provide a step-by-step guide on how to install it on your Honda CMX 1100.
Part 1: The Advantages of Acquiring the Chip Tuning Module for the Honda CMX 1100
Increased Power and Torque:
One of the primary reasons to consider purchasing the chip tuning module for your Honda CMX 1100 is the significant boost in power and torque it provides. This module optimizes the engine’s performance by adjusting fuel injection, ignition timing, and other key parameters. As a result, you can expect a noticeable increase in horsepower and torque, delivering enhanced acceleration and overall responsiveness. Experience the thrill of a more powerful ride that commands the road with confidence.
Improved Fuel Efficiency:
Contrary to popular belief, chip tuning doesn’t always mean sacrificing fuel efficiency. In fact, the chip tuning module for the Honda CMX 1100 is designed to optimize fuel combustion, leading to improved fuel efficiency. With a more finely tuned engine, you can enjoy a longer range on each tank of fuel, ultimately saving you money at the pump and extending your adventures on the open road.
Customizable Performance:
The chip tuning module offers the advantage of customization, allowing you to tailor your motorcycle’s performance to your specific preferences. Through adjustable settings, such as throttle response and power delivery, you have the freedom to fine-tune your Honda CMX 1100’s performance to suit your riding style. Whether you prefer a more aggressive and sporty ride or a smoother and more relaxed cruising experience, the chip tuning module empowers you to personalize your motorcycle’s performance.
Plug-and-Play Installation:
Installing the chip tuning module is a straightforward process that can be done without the need for extensive mechanical knowledge. It is designed as a plug-and-play unit, which means it connects directly to the motorcycle’s electronic control unit (ECU) without the need for any permanent modifications. Simply follow the provided instructions, and you’ll be ready to unlock the full potential of your Honda CMX 1100 in no time.
Part 2: Step-by-Step Installation Guide
Now, let’s explore the step-by-step installation process for the chip tuning module on the Honda CMX 1100:
Tools Required:
Before you begin, ensure you have the following tools:
- Socket wrench set
- Screwdriver (Phillips and flathead)
- Electrical tape or zip ties (for cable management)
Step 1: Preparation
Park your Honda CMX 1100 on a stable and level surface. Allow the engine to cool before starting the installation process. Gather all the necessary tools and ensure the chip tuning module and accompanying cables are readily accessible.
Step 2: Locating the ECU
Locate the ECU of your Honda CMX 1100. Typically, it is positioned under the seat or within the motorcycle’s side panels. Refer to the owner’s manual or online resources for precise instructions on locating the ECU for your specific model year.
Step 3: Connecting the Chip Tuning Module
Carefully connect the chip tuning module’s harness to the ECU. Ensure a secure and proper connection by aligning the pins and gently pushing the connector in place.
Route the module’s cable along the existing wiring harness, ensuring it is clear of any moving parts and adequately secured using electrical tape or zip ties.
Double-check all connections to ensure they are secure and properly seated.
Step 4: Final Checks
Reinstall any removed side panels or seat, ensuring they are securely fastened.
Start the engine and allow it to idle for a few minutes. Monitor for any unusual sounds or warning lights.
Take a short test ride to ensure the chip tuning module is functioning correctly. Pay attention to throttle response, power delivery, and overall performance.
Investing in the chip tuning module for the Honda CMX 1100 from Racext offers a myriad of benefits. From increased power and torque to improved fuel efficiency and customizable performance, this module transforms your riding experience. With its plug-and-play installation and ability to fine-tune your motorcycle’s performance, you can effortlessly unlock the full potential of your Honda CMX 1100. Upgrade your ride today and experience the exhilaration that comes with the chip tuning module.
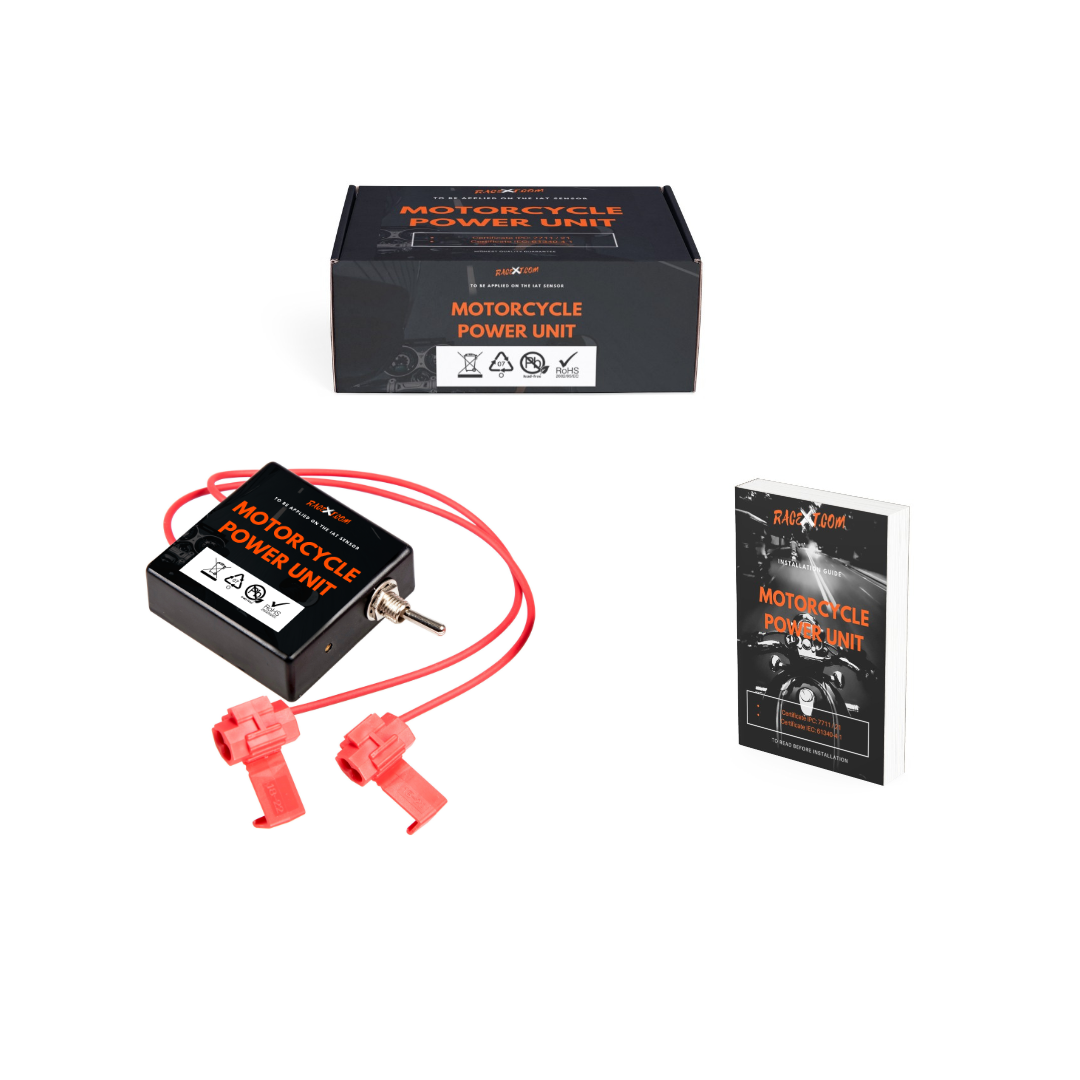
Unleash the Potential: The Benefits of Acquiring the Chip Tuning Module for the Honda CMX 500

As a skilled mechanic, I am constantly seeking innovative products that can enhance the performance of motorcycles. Today, I am excited to delve into the chip tuning module for the Honda CMX 500. Available at Racext, this remarkable product offers a wide array of advantages that can revolutionize your riding experience. In this article, I will explore the reasons why investing in this module is a wise choice, and I will provide a step-by-step guide on how to install it on your Honda CMX 500.
Part 1: The Advantages of Acquiring the Chip Tuning Module for the Honda CMX 500
Increased Power and Torque:
One of the primary reasons to consider purchasing the chip tuning module for your Honda CMX 500 is the significant boost in power and torque it provides. This module optimizes the engine’s performance by adjusting key parameters, such as fuel injection and ignition timing. As a result, you can expect a noticeable increase in horsepower and torque, delivering enhanced acceleration and overall responsiveness. Experience the thrill of a more powerful ride that commands the road with confidence.
Improved Fuel Efficiency:
Contrary to popular belief, chip tuning doesn’t always mean sacrificing fuel efficiency. In fact, the chip tuning module for the Honda CMX 500 is designed to optimize fuel combustion, leading to improved fuel efficiency. With a more finely tuned engine, you can enjoy a longer range on each tank of fuel, ultimately saving you money at the pump and extending your adventures on the open road.
Enhanced Throttle Response:
The chip tuning module significantly improves throttle response, providing instant power delivery and a more exhilarating riding experience. The enhanced throttle sensitivity ensures a seamless connection between your throttle inputs and the engine’s performance, resulting in a more dynamic and engaging ride. Feel the surge of power at your fingertips as you accelerate through the gears.
Customizable Performance:
The chip tuning module offers the advantage of customization, allowing you to tailor your motorcycle’s performance to suit your specific preferences. Through adjustable settings, such as power levels and throttle sensitivity, you have the freedom to fine-tune your Honda CMX 500’s performance to match your riding style. Whether you desire a more aggressive and sporty ride or a smoother and more relaxed cruising experience, the chip tuning module empowers you to personalize your motorcycle’s performance.
Part 2: Step-by-Step Installation Guide
Now, let’s explore the step-by-step installation process for the chip tuning module on the Honda CMX 500:
Tools Required:
Before you begin, ensure you have the following tools:
- Socket wrench set
- Screwdriver (Phillips and flathead)
- Electrical tape or zip ties (for cable management)
Step 1: Preparation
Park your Honda CMX 500 on a stable and level surface. Allow the engine to cool before starting the installation process. Gather all the necessary tools and ensure the chip tuning module and accompanying cables are readily accessible.
Step 2: Locating the Intake Air Temperature (IAT) Sensor
Locate the IAT sensor of your Honda CMX 500. The IAT sensor is typically located on the intake manifold or airbox. Refer to the owner’s manual or online resources for precise instructions on locating the IAT sensor for your specific model year.
Step 3: Connecting the Chip Tuning Module
Carefully connect the chip tuning module’s harness to the IAT sensor. Ensure a secure and proper connection by aligning the pins and gently pushing the connector in place.
Route the module’s cable along the existing wiring harness, ensuring it is clear of any moving parts and adequately secured using electrical tape or zip ties.
Double-check all connections to ensure they are secure and properly seated.
Step 4: Final Checks
Reinstall any removed panels or covers, ensuring they are securely fastened.
Start the engine and allow it to idle for a few minutes. Monitor for any unusual sounds or warning lights.
Take a short test ride to ensure the chip tuning module is functioning correctly. Pay attention to throttle response, power delivery, and overall performance.
Investing in the chip tuning module for the Honda CMX 500 from Racext offers a myriad of benefits. From increased power and torque to improved fuel efficiency, enhanced throttle response, and customizable performance, this module unlocks the full potential of your motorcycle. With its easy installation process and ability to fine-tune your Honda CMX 500’s performance, you can elevate your riding experience to new heights. Upgrade your ride today and experience the thrill that comes with the chip tuning module.
Enhance Control and Safety: The Benefits of Acquiring the Motorcycle Brake Lever Enlarge Pad and Brake Footrest Pedal Extension for Honda CMX300/CMX500
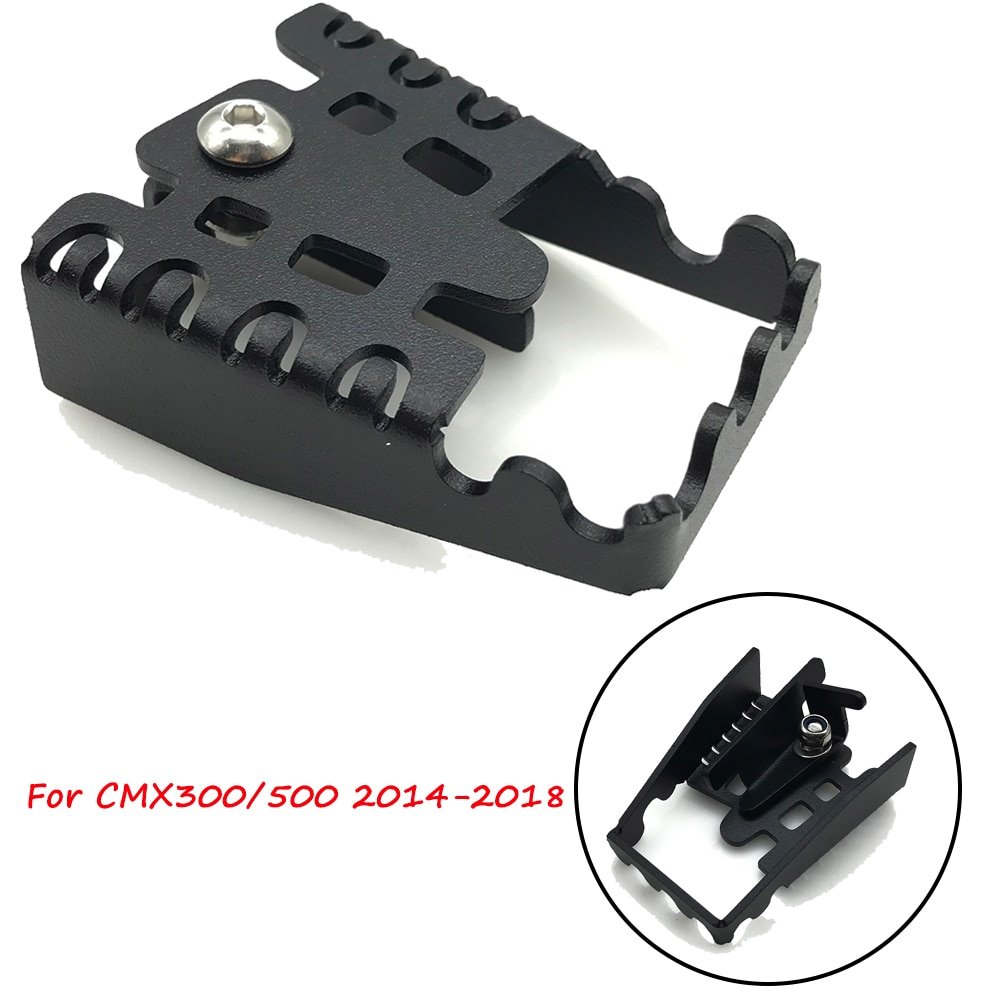
As an experienced mechanic, I am always on the lookout for products that can improve both the performance and safety of motorcycles. Today, I am thrilled to discuss the motorcycle brake lever enlarge pad and brake footrest pedal extension designed specifically for the Honda CMX300 and CMX500. Available at Racext, this innovative product offers a range of advantages that can transform your riding experience. In this article, I will explain why investing in this product is a wise decision, and I will provide a step-by-step guide on how to install it on your Honda CMX300/CMX500.
Part 1: The Advantages of Acquiring the Motorcycle Brake Lever Enlarge Pad and Brake Footrest Pedal Extension
Enhanced Control and Comfort:
One of the primary reasons to consider purchasing the motorcycle brake lever enlarge pad and brake footrest pedal extension is the significant improvement in control and comfort they provide. These extensions offer a larger surface area for your brake lever and footrest pedal, allowing for a more secure grip and better control over braking maneuvers. With increased leverage, you can apply more precise and consistent pressure, enhancing your overall riding experience.
Improved Safety:
Safety should always be a top priority for riders, and the brake lever enlarge pad and brake footrest pedal extension contribute to a safer riding environment. The larger surface area and anti-skid design ensure a firm grip in various weather conditions, preventing slippage and enhancing your ability to respond quickly to sudden braking situations. By improving your control and grip, these extensions help reduce the risk of accidents and provide added confidence while riding.
Easy Installation:
Installing the motorcycle brake lever enlarge pad and brake footrest pedal extension is a straightforward process that can be done without extensive mechanical knowledge. The product is designed to fit perfectly on the Honda CMX300 and CMX500 models, and it comes with detailed installation instructions. With basic tools and a little patience, you can easily complete the installation in no time, allowing you to enjoy the benefits of the extensions right away.
Part 2: Step-by-Step Installation Guide
Now, let’s explore the step-by-step installation process for the motorcycle brake lever enlarge pad and brake footrest pedal extension on the Honda CMX300/CMX500:
Tools Required:
Before you begin, ensure you have the following tools:
Socket wrench set
Allen wrench set
Screwdriver (Phillips and flathead)
Step 1: Preparation
Park your Honda CMX300/CMX500 on a stable and level surface. Ensure the engine is turned off and cooled down. Gather all the necessary tools and ensure the brake lever enlarge pad and brake footrest pedal extension are readily accessible.
Step 2: Installing the Brake Lever Enlarge Pad
Locate the existing brake lever on your Honda CMX300/CMX500.
Carefully remove any screws or bolts securing the brake lever cover or pad.
Attach the brake lever enlarge pad to the brake lever using the provided screws or bolts. Ensure a secure fit by tightening them appropriately.
Double-check the installation to ensure the brake lever enlarge pad is securely attached.
Step 3: Installing the Brake Footrest Pedal Extension
Locate the existing brake footrest pedal on your Honda CMX300/CMX500.
Using an Allen wrench, remove the bolts securing the brake footrest pedal.
Attach the brake footrest pedal extension to the pedal using the provided bolts.
Ensure a secure fit by tightening the bolts appropriately.
Double-check the installation to ensure the brake footrest pedal extension is securely attached.
Step 4: Final Checks
Test the functionality of the brake lever and footrest pedal to ensure smooth operation.
Check for any signs of looseness or instability in the installed extensions. If necessary, tighten the screws or bolts further.
Take a short test ride to become familiar with the new brake lever enlarge pad and brake footrest pedal extension. Pay attention to the improved control and comfort.
Investing in the motorcycle brake lever enlarge pad and brake footrest pedal extension for the Honda CMX300/CMX500 from Racext is a decision that brings numerous benefits to your riding experience. From enhanced control and comfort to improved safety, these extensions elevate your riding performance and confidence. With their easy installation process and custom-fit design, you can quickly upgrade your motorcycle and start enjoying the advantages right away. Elevate your control and safety on the road by acquiring the motorcycle brake lever enlarge pad and brake footrest pedal extension for your Honda CMX300/CMX500.
Protect Your Engine: The Benefits of Acquiring the Motorcycle Right Engine Pulse Ignition Timing Cover Stator Crankcase Guard Protector for Honda CMX300/CMX500
As a seasoned mechanic, I am constantly seeking ways to enhance the performance and durability of motorcycles. Today, I am thrilled to introduce the motorcycle right engine pulse ignition timing cover stator crankcase guard protector designed specifically for the Honda CMX300 and CMX500. Available at Racext, this exceptional product offers a host of advantages that can significantly enhance your riding experience. In this article, I will explain why investing in this protector is a wise decision, and I will provide a comprehensive step-by-step guide on how to install it on your Honda CMX300/CMX500.
Part 1: The Advantages of Acquiring the Motorcycle Right Engine Pulse Ignition Timing Cover Stator Crankcase Guard Protector
Enhanced Engine Protection:
The primary reason to consider purchasing the motorcycle right engine pulse ignition timing cover stator crankcase guard protector is the enhanced protection it provides for your engine. This durable guard is designed to shield the vulnerable parts of your engine, such as the pulse ignition timing cover and stator crankcase, from potential damage caused by debris, rocks, or accidental impacts. By installing this protector, you can effectively safeguard your engine and prolong its lifespan.
Improved Off-Road Capability:
If you enjoy off-road riding adventures with your Honda CMX300/CMX500, this guard protector becomes even more valuable. Off-road terrains often present various hazards, including rocks, branches, and uneven surfaces that can pose a threat to your engine’s vital components. The guard protector acts as a reliable shield, allowing you to navigate through challenging trails with confidence, knowing that your engine is well-protected against potential damage.

Easy Installation:
Installing the motorcycle right engine pulse ignition timing cover stator crankcase guard protector is a relatively straightforward process that can be completed with basic tools and minimal mechanical knowledge. The product is specifically designed to fit the Honda CMX300 and CMX500 models, ensuring a perfect match. With the provided installation instructions and a little patience, you can easily complete the installation and enjoy the benefits of added engine protection.
Part 2: Step-by-Step Installation Guide
Now, let’s explore the step-by-step installation process for the motorcycle right engine pulse ignition timing cover stator crankcase guard protector on the Honda CMX300/CMX500:
Tools Required:
Before you begin, ensure you have the following tools:
- Socket wrench set
- Allen wrench set
- Screwdriver (Phillips and flathead)
Step 1: Preparation
Park your Honda CMX300/CMX500 on a stable and level surface. Ensure the engine is turned off and cooled down. Gather all the necessary tools and ensure the guard protector and accompanying hardware are readily accessible.
Step 2: Removing the Existing Cover
Locate the pulse ignition timing cover and stator crankcase on your Honda CMX300/CMX500.
Using an Allen wrench or socket wrench, remove the bolts securing the existing cover.
Carefully detach the cover and set it aside.
Step 3: Installing the Guard Protector
Place the motorcycle right engine pulse ignition timing cover stator crankcase guard protector over the exposed engine components.
Align the mounting holes on the protector with the corresponding holes on the engine.
Insert the provided bolts through the mounting holes and tighten them using an Allen wrench or socket wrench. Ensure a secure fit without over-tightening.
Step 4: Final Checks
Double-check the installation to ensure the guard protector is securely attached and properly aligned.
Inspect the surrounding area to ensure there are no loose components or obstructions that could interfere with the guard protector’s functionality.
Start the engine and let it idle for a few minutes while monitoring for any unusual sounds or vibrations.
Investing in the motorcycle right engine pulse ignition timing cover stator crankcase guard protector for the Honda CMX300/CMX500 from Racext is a decision that brings numerous benefits to your riding experience. From enhanced engine protection and improved off-road capability to easy installation, this guard protector ensures your engine stays safe and performs optimally throughout your journeys. Upgrade your Honda CMX300/CMX500 today and enjoy the peace of mind that comes with added engine protection.
Enhance Grip and Style: The Benefits of Acquiring the Motorcycle Anti-Heated Gas Tank Side Traction Knee Protector Anti-Slip Pad for Honda CMX1100
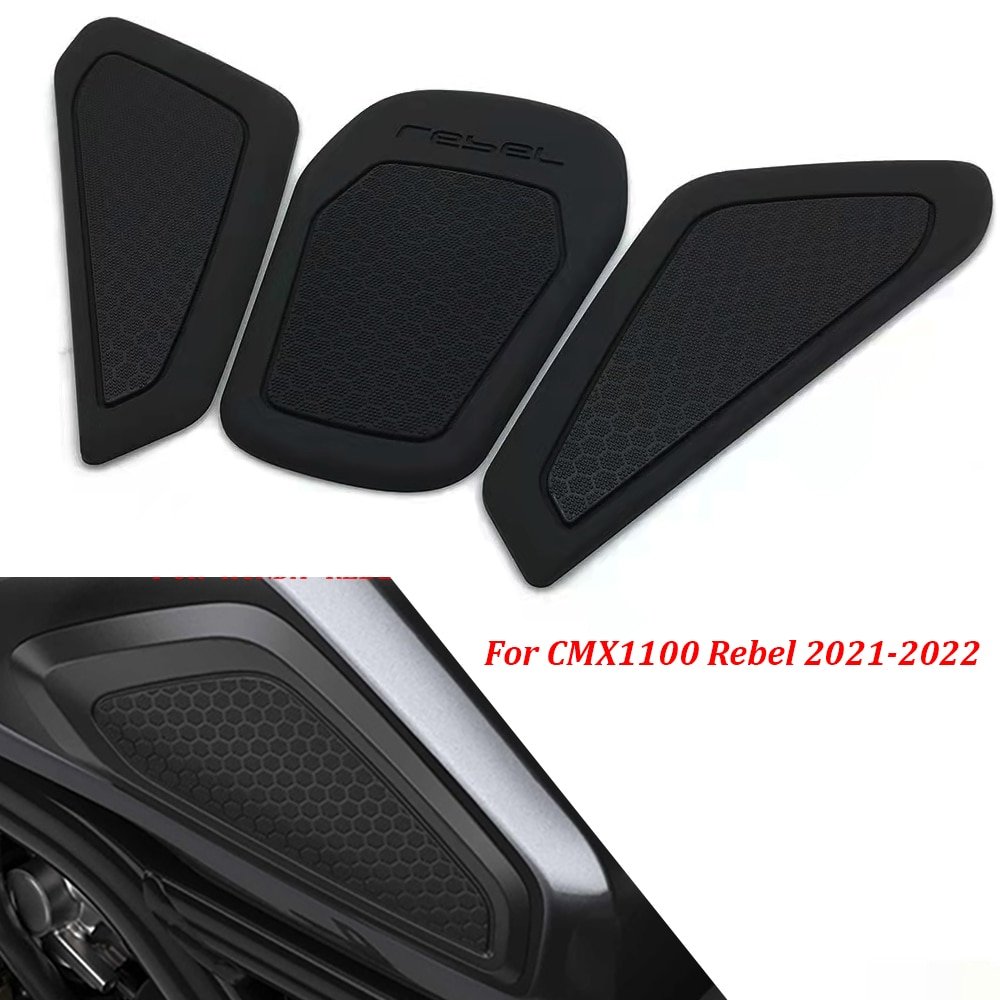
As an experienced mechanic, I am always on the lookout for products that can improve both the performance and aesthetics of motorcycles. Today, I am excited to introduce the motorcycle anti-heated gas tank side traction knee protector anti-slip pad designed specifically for the Honda CMX1100 Rebel 2021-2022. Available at Racext, this exceptional product offers a range of advantages that can significantly enhance your riding experience. In this article, I will explain why investing in this knee protector is a wise decision, and I will provide a comprehensive step-by-step guide on how to install it on your Honda CMX1100.
Part 1: The Advantages of Acquiring the Motorcycle Anti-Heated Gas Tank Side Traction Knee Protector Anti-Slip Pad
Improved Grip and Control:
One of the primary reasons to consider purchasing the motorcycle anti-heated gas tank side traction knee protector anti-slip pad is the significant improvement in grip and control it provides. These pads are designed to offer enhanced traction between your knees and the gas tank, allowing for a more secure and stable riding position. With improved grip, you can confidently maneuver your Honda CMX1100, especially during cornering or high-speed rides, resulting in enhanced control and overall riding experience.
Heat Protection:
Long rides or exposure to sunlight can cause the gas tank surface to heat up, making it uncomfortable for riders to rest their knees against it. The anti-heated feature of these knee protectors helps to dissipate heat, ensuring a cooler surface for your knees to lean on. This feature is particularly beneficial during warm weather or extended riding sessions, providing added comfort and reducing fatigue.
Anti-Slip Design:
The anti-slip properties of these knee protectors offer additional safety and stability during your rides. The specially designed patterns or materials on the pads enhance friction, preventing your knees from slipping or sliding on the gas tank surface. This feature becomes especially valuable when riding in wet or rainy conditions, as it helps maintain a firm grip and reduces the risk of accidents caused by loss of control.
Part 2: Step-by-Step Installation Guide
Now, let’s explore the step-by-step installation process for the motorcycle anti-heated gas tank side traction knee protector anti-slip pad on the Honda CMX1100:
Tools Required:
Before you begin, ensure you have the following tools:
- Rubbing alcohol or mild cleaner
- Clean cloth
- Adhesive promoter (if included)
- Heat gun or hairdryer (optional)
Step 1: Preparation
Park your Honda CMX1100 on a stable surface and ensure the gas tank is clean and free from dust, dirt, or residue. Gather all the necessary tools and ensure the knee protectors are readily accessible.
Step 2: Cleaning the Gas Tank
Use rubbing alcohol or a mild cleaner to clean the gas tank surface thoroughly. This step ensures proper adhesion of the knee protectors.
Wipe the gas tank surface with a clean cloth to remove any excess cleaner or moisture.
Step 3: Applying Adhesive Promoter (if included)
If the knee protectors come with an adhesive promoter, apply a small amount to the gas tank surface following the manufacturer’s instructions.
Allow the adhesive promoter to dry for the recommended time.
Step 4: Installing the Knee Protectors
Carefully peel off the backing from the adhesive side of the knee protectors.
Align the protectors with the desired position on each side of the gas tank, ensuring proper fit and alignment with your knees.
Gently press the protectors onto the gas tank surface, starting from one end and working your way to the other. Apply even pressure to ensure proper adhesion.
Step 5: Final Checks
Once the knee protectors are installed, press them firmly to ensure a secure bond.
If using a heat gun or hairdryer, gently heat the protectors to activate the adhesive and enhance adhesion.
Allow the adhesive to cure for the recommended time before riding your Honda CMX1100.
Investing in the motorcycle anti-heated gas tank side traction knee protector anti-slip pad for the Honda CMX1100 Rebel 2021-2022 from Racext is a decision that brings numerous benefits to your riding experience. From improved grip and control to heat protection and anti-slip properties, these knee protectors offer enhanced safety, comfort, and style. With their easy installation process and customized design for the Honda CMX1100, you can quickly upgrade your motorcycle and start enjoying the advantages right away. Elevate your riding experience and ride in style by acquiring the motorcycle anti-heated gas tank side traction knee protector anti-slip pad for your Honda CMX1100 Rebel 2021-2022.